Carborundum printmaking is a type of intaglio printmaking that uses a paste of Carborundum powder to create a rough, textured surface on a metal plate. The plate is then inked and printed, resulting in prints with a distinctive, painterly look. This technique was first introduced by Henri Goetz in the 1960s and has since become a popular medium among artists.
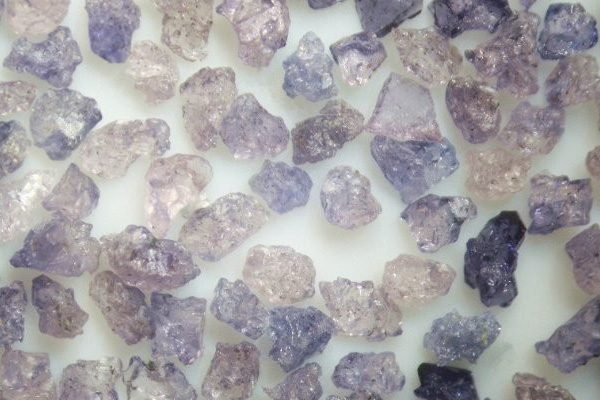
Carborundum is a type of silicon carbide, which is a hard, abrasive material. It is often used in industrial applications, such as sanding and polishing. In Carborundum printmaking, the Carborundum powder is mixed with a binder, such as glue or acrylic medium, to form a paste. This paste is then applied to the surface of a metal plate. When the paste dries, it creates a rough, textured surface.
Why SiC is Perfect for Carborundum Printmaking?
Silicon Carbide is an ideal material for Carborundum printmaking due to its hardness, durability, and ability to create a wide range of textures. Its abrasive properties enable it to create deep grooves and scratches in the printing plate, which can be used to create interesting patterns and textures. Silicon Carbide is also resistant to wear and tear, making it ideal for creating large edition prints.
How to Use Silicon Carbide for Carborundum Printmaking?
To use Silicon Carbide for Carborundum printmaking, you will need the following materials:
- A metal plate or surface to print on
- Carborundum grit in various sizes
- A binder such as PVA glue or acrylic medium
- A scraper or squeegee
- A printing press or a heavy roller
Here are the steps to follow:
- Clean your metal plate or surface with alcohol to remove any dirt or oil.
- Mix the Carborundum grit with the binder to create a thick paste.
- Apply the Carborundum paste onto the plate with a scraper or squeegee. You can create various textures by applying the paste in different thicknesses and patterns.
- Allow the plate to dry completely. This may take several hours or overnight.
- Once the plate is dry, ink it up and print it using a printing press or a heavy roller. You can experiment with different colors and papers to create unique prints.